San Francisco Sourdough Recipe and Method
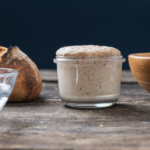
So, you have your active starter, it’s time to make some San Francisco Sourdough Bread!
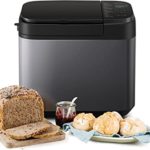
The recipe below is suitable for a Bread Maker or Oven Cooking
500 gms Strong White Bread Flour, the higher the protein content (gluten) the better. I like using 14g protein content. You can use anything from 10g upwards.
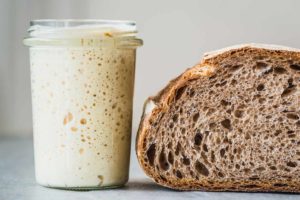
300 gms/mls San Francisco Sourdough Starter
170 mls Spring Water at 37 – 40 degrees C
1.5 tsp salt
2 Tbsp Olive or Unrefined Rape Oil
Banneton Proving Basket, round or oval or both.

Non-Stick Baking Parchment

Dutch Oven or Standard Baking Tray

Rice Flour for Coating Banneton Proving Basket


If using a Bread Maker, add the wet ingredients first:
Water, San Francisco Sourdough Starter and Oil.
Add Flour and add salt on top of flour. Start the Bread Maker on the Sourdough setting. I set it to a 1K loaf and extra colour.
The complete program takes about 6.5 hours.
Keep this in mind if you want to eat the Sourdough Bread with a meal. You will need to let the loaf cool for about an hour on a cake rack before slicing.
With Oven Cooking you follow a different procedure:
Use a large bowl. As above, place the wet ingredients in the bowl first. Add the flour and salt on top. Mix well until dough is smooth and elastic. I also use a mixing machine, which cuts down some of the labour involved in mixing. However, you may find that making by hand has a more therapeutic effect.
Cover with a cloth and leave to stand in a warm room to double in size. This will take a couple of hours. As you are using natural yeasts, it takes longer to rise than artificial dried yeast.
When the dough has double in size, you need to knock it back, either by hand or machine. This helps reduce and distribute the large gas bubbles that have formed and stretches the gluten.
For a really Artisan Look, place the dough in a Banneton Basket, which provides a pleasant pattern and keeps the dough in shape. Cover loosely with a cloth. Let it double in size, which will take another couple of hours.
45 minutes before cooking, turn on your oven to preheat to maximum temperature. Add your empty Dutch Oven with lid on to preheat also for about 15 minutes at the maximum temperature.
Using a square piece of Baking Parchment, turn the Banneton Basket upside down onto the parchment. You can use this to transfer to your Dutch Oven. You can also use a standard baking tray, but the loaf will tend to spread.
Bring your preheated Dutch Oven from the main oven. Take off the lid. Lift the Sourdough using the parchment as a tray. Add the parchment and Sourdough to Your Dutch Oven and slash the top of the dough with a Bread Lame and add the lid. Place in oven set at 230 degrees C in a standard oven or 210 degrees C in a fan oven.
Bake for 30 minutes, remove lid from Dutch Oven and bake for a further 25-30 minutes until golden brown. Check the internal temperature of the bread with a Digital Temperature Probe, it should read 97-99 degrees C.
Empty the Sourdough Bread onto a surface, knock the bottom of the loaf, it should sound hollow.
Place onto a Cake Rack to cool down for at least half an hour, but preferably an hour.
It is now ready to slice up with your Serrated Knife!…Enjoy